


Image optimization is so important when it comes to building a fast, SEO-friendly blog and user experience on your Showit website. Page speed is a huge ranking factor for Google and other search engines. You have to optimize your images on your website and blog to have a super fast website.
Optimizing your images does not mean you have to sacrifice quality. Many of you are wedding photographers looking to increase your website SEO so I understand that it is important that your photos look sharp on your website.
In this post, I am going to show you how to optimize your images without sacrificing quality.
Before we jump into this post, I wanted to let you know that if you’re looking for SEO help, I have a few ways I can help you.
I have a free SEO blog post checklist that you can download today that shows you how to craft beautiful, SEO-friendly blog posts.
I also have a really great, easy-to-use, Showit SEO Course that covers everything you need to know about Showit SEO all in one place.
And lastly, I create a ton of free SEO resources for Tonic Site Shop. Check them out!
How to optimize images for Showit and WordPress
This post is extensive and will go over multiple ways to optimize your images for your Showit website using GTMetrix, WordPress plugins, and desktop applications.
Index
- Why optimize your website images
- How to optimize images on your Showit website
- How to optimize images before uploading to Showit
- How to optimize images for your WordPress blog
- Conclusion
Why optimize your website images
Optimizing your images is going to significantly increase the speed of your website and blog. Your website speed (page load time) is a top ranking factor for Google and many other search engines.
In most cases, images are what take the most time to load when viewing your website or blog. So if your images are not optimized then your website is going to load super slow.
As a wedding photographer, you need to think about your website visitor who is most likely a potential client. Statistics show that most website visitors leave a site if it does not load within 4 seconds.
As a wedding photographer who uploads multiple images to one blog post, you have to make sure your images are optimized or your website will load slow, your user experience will be bad, and your SEO ranking will drop.
How to optimize images on your Showit website
If you’ve already uploaded images to your Showit website (not
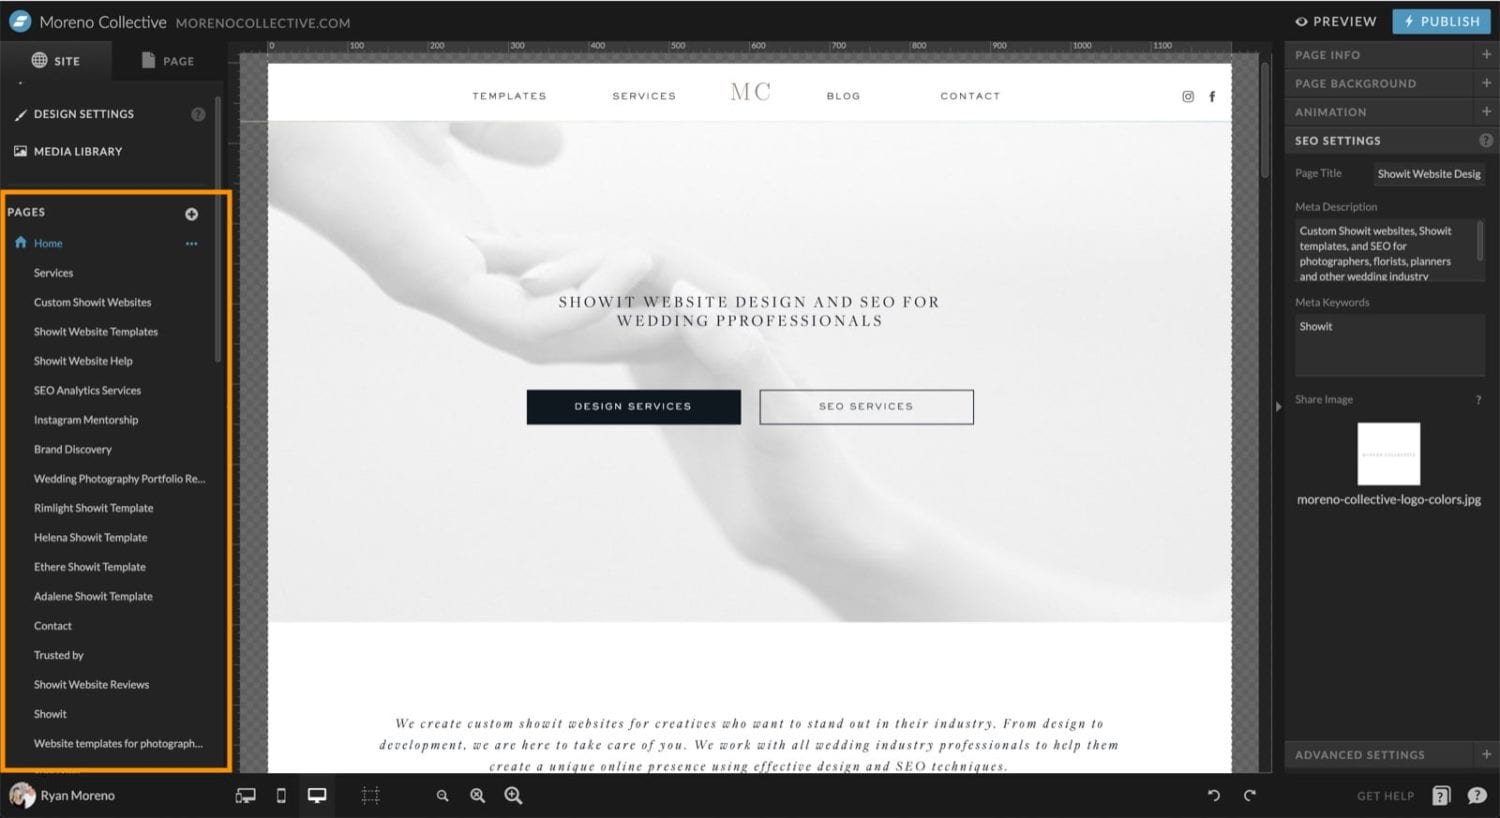
Start with the homepage and move on to every other page listed in your Showit account (except blog posts/pages).
Once the performance report has loaded, click on the “Optimize images” tab. You will see a list of image links that need to be optimized. GTMetrix also gives you a “See Optimized Version” link as well.
You can use these links to open the optimized image in a new tab and save the image to your computer. You can then re-upload and replace each image on your Showit website. Don’t forget to publish your site when you’ve uploaded all your images!
How to optimize images before uploading to Showit
If you are uploading your images into Showit, you should optimize them beforehand.
Optimizing your images before you upload them to Showit gives you the advantage of viewing the quality before they are on your website. It also speeds up the upload time and saves server space.
I will be going over two desktop application (one paid, one free) that both do a great job at optimizing your images.
Pro tip
If you have Lightroom, optimizing your images for web inside Lightroom should be part of your Lightroom Workflow. If you are curious, I have a few posts about how to set up a great Lightroom workflow and how to export optimized images using Lightroom.
Step 1: Figure out how wide your images should be
To make sure your images are sharp on retina and HD screens, they should be 2x the width of the image container on your Showit website and blog.
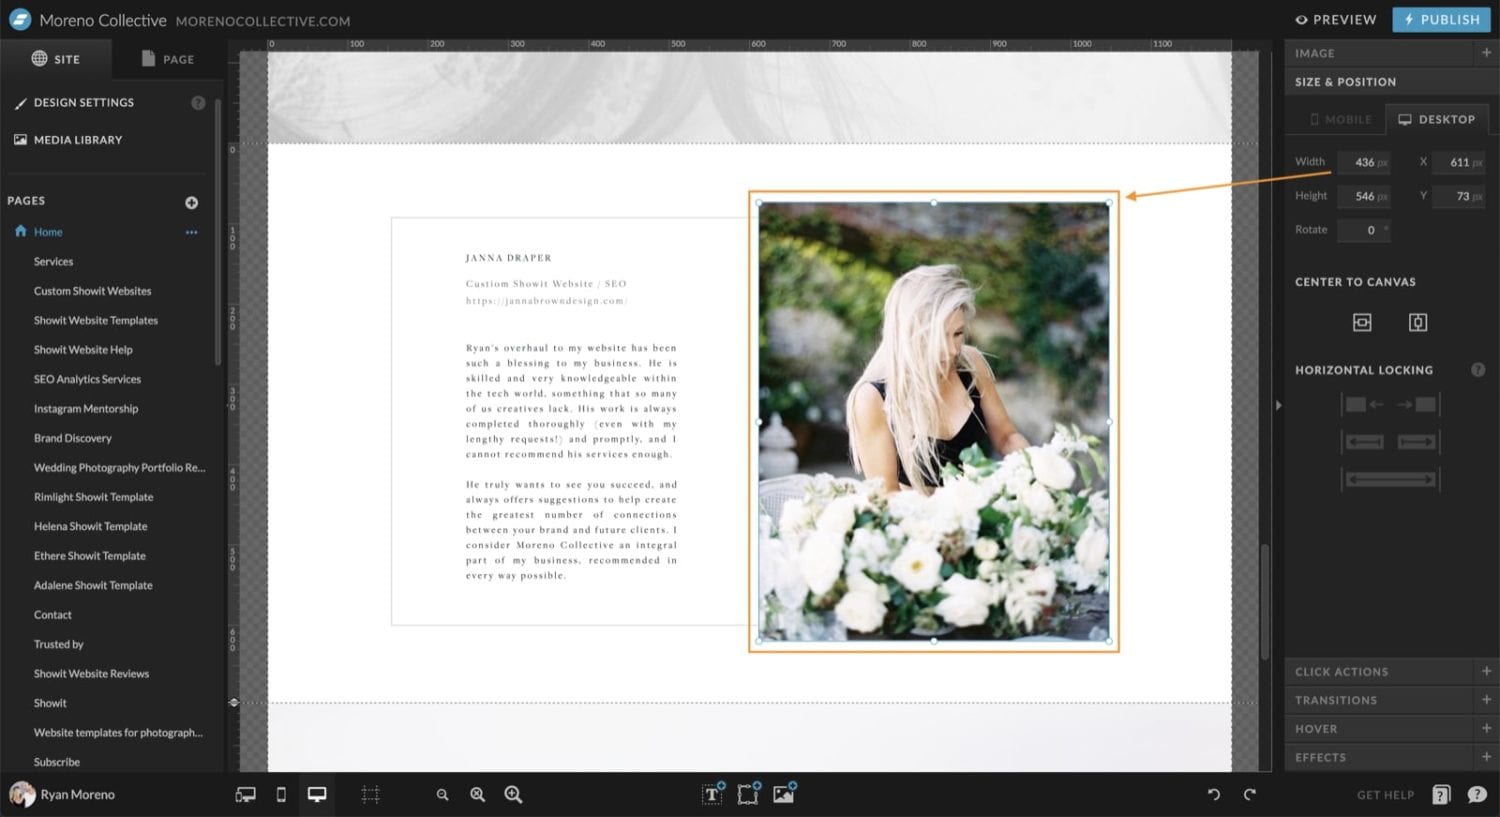
To figure out how wide your image is, log into Showit and click on the image you are updating. Then click on the “Size & Position” tab and look for the image width.
Now, do the same for your blogs “single post” template page.
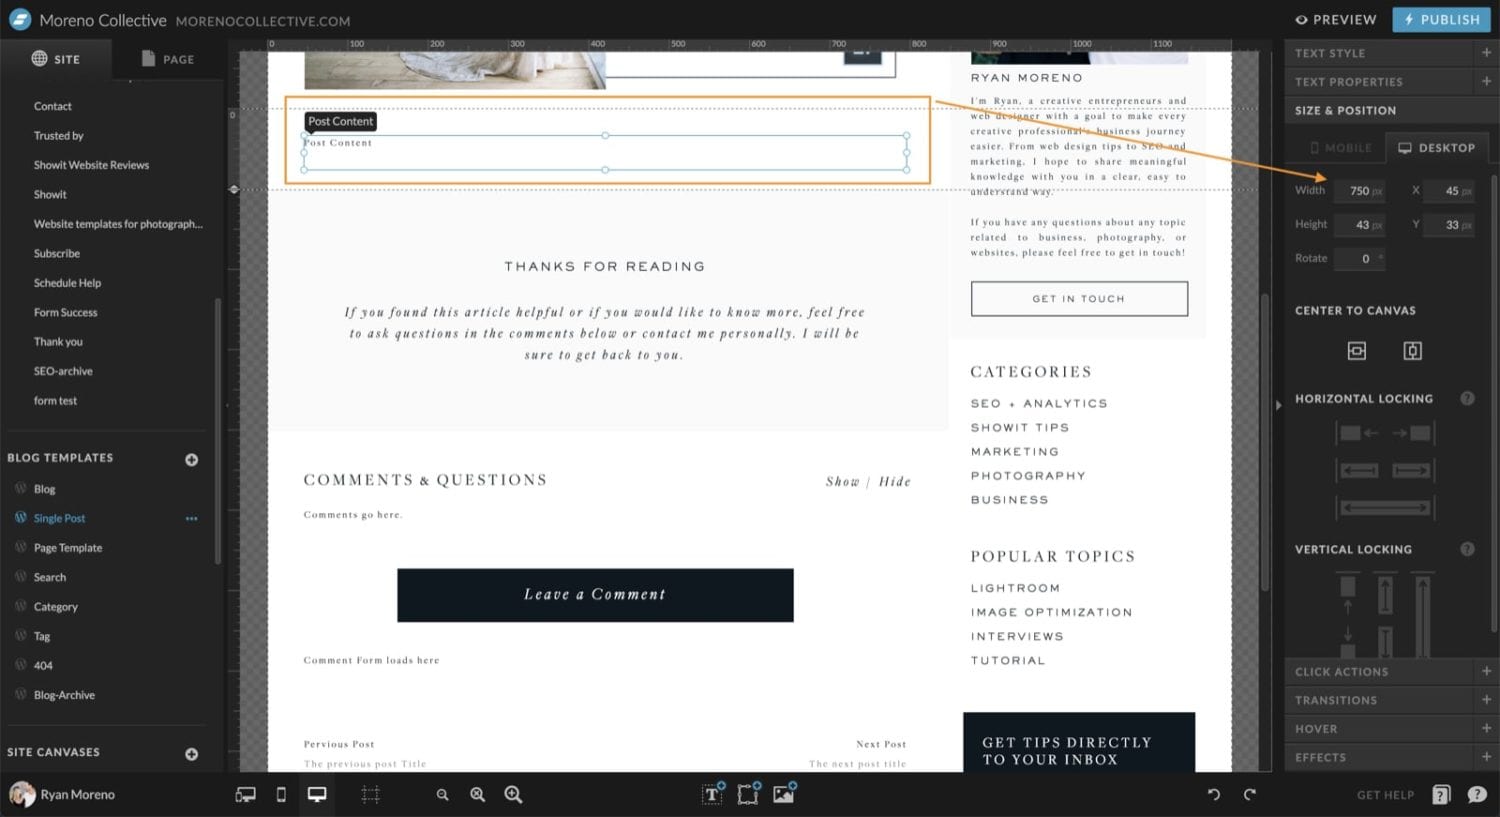
For the Moreno Collective blog, our post content container is 750px wide. This means that the images that I upload should be 1500px wide. (We’ll discuss optimizing blog images later, just keep this in mind).
After you know how wide your images need to be on your Showit website, it’s time to optimize them.
JPEGmini – paid image optimization tool
JPEG mini is an easy-to-use, drag-and-drop bulk image optimization tool that every photographer should be utilizing. It’s a one time cost of $89 that, in my opinion, is totally worth it.
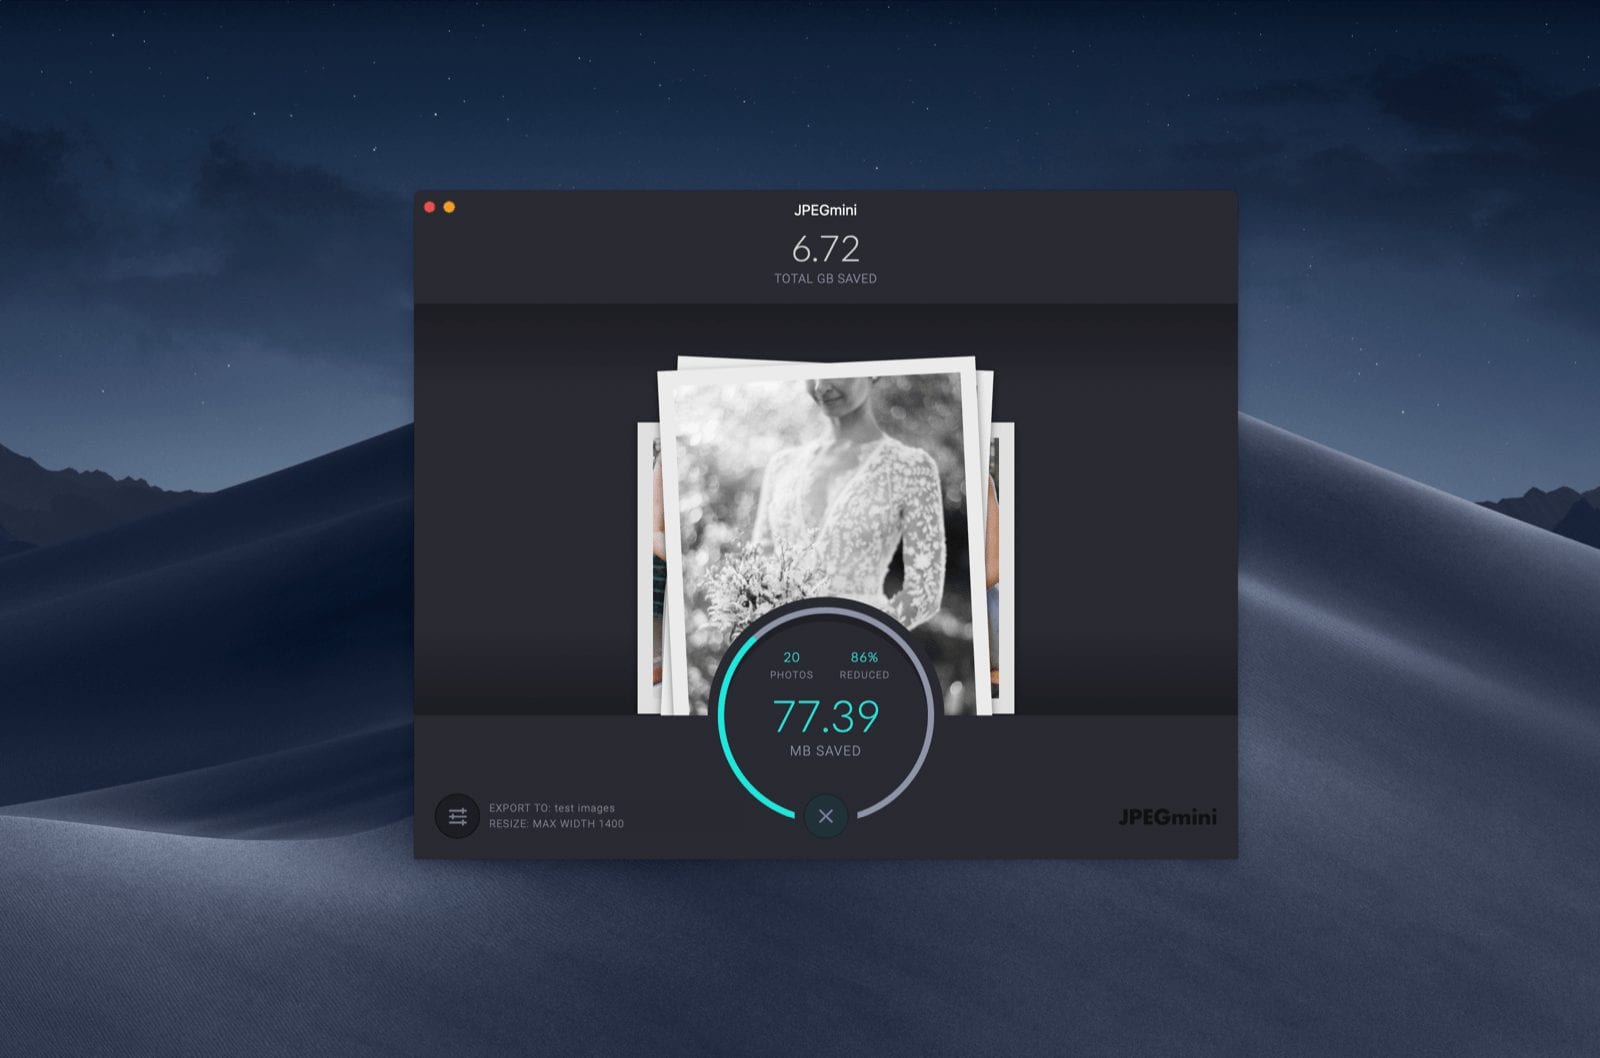
Here’s how I optimize images using JPEG mini
- Create a new folder containing a copy of all the high-resolution images that you want to optimize. (Never optimize the originals!)
- Figure out how wide your images need to be
- Open the JPEGmin settings
- Set the “Export to:” folder path. I usually create a folder called “optimized” inside the main folder.
- Set “resize” to ‘Max Width’ and add the pixel width (2x of the image container). If there are multiple sizes then you will need to repeat the optimization process for each different width.
- Click apply
- Select the high-resolution images and drag them into the JPEGmini window
- Repeat for the next width if needed
Your images are now ready to be uploaded to your Showit website!
Pro Tip
As a rule of thumb, try to keep every image under 250kb.
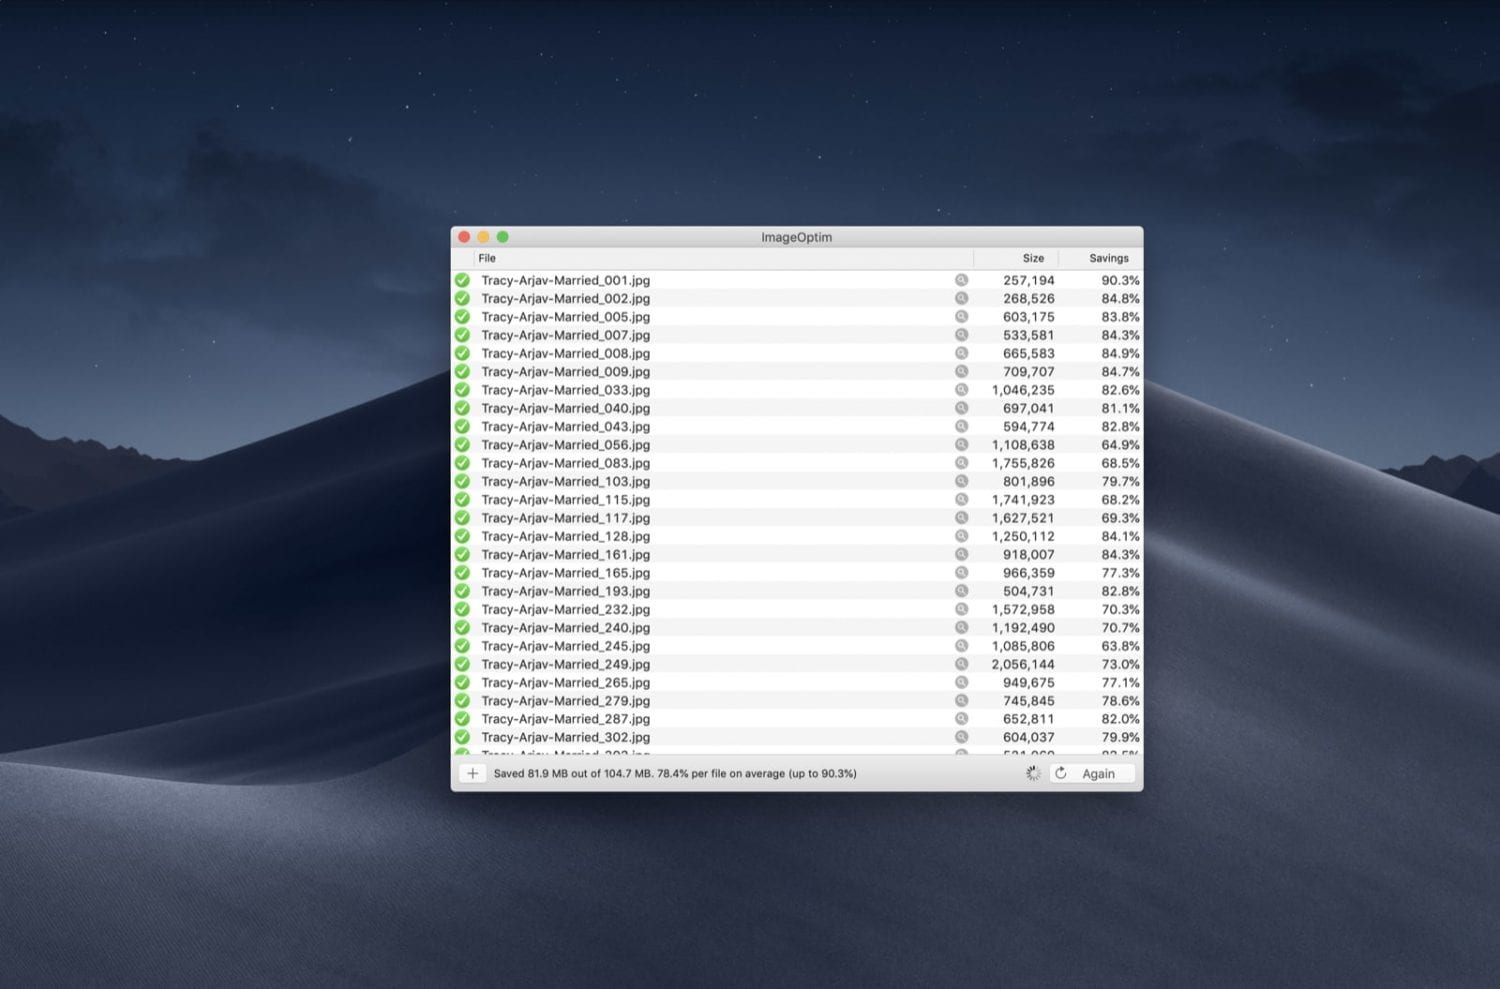
ImageOptim – Free (and preferred) image optimization tool
ImageOptim is a free image optimization tool for Mac that “makes pages load faster”.
The upside is that is has more image optimization settings and can make your image files even smaller than JPEGmini, but it does not have the resizing feature that is so useful in JPEGmini.
How to resize your images in Preview (mac)
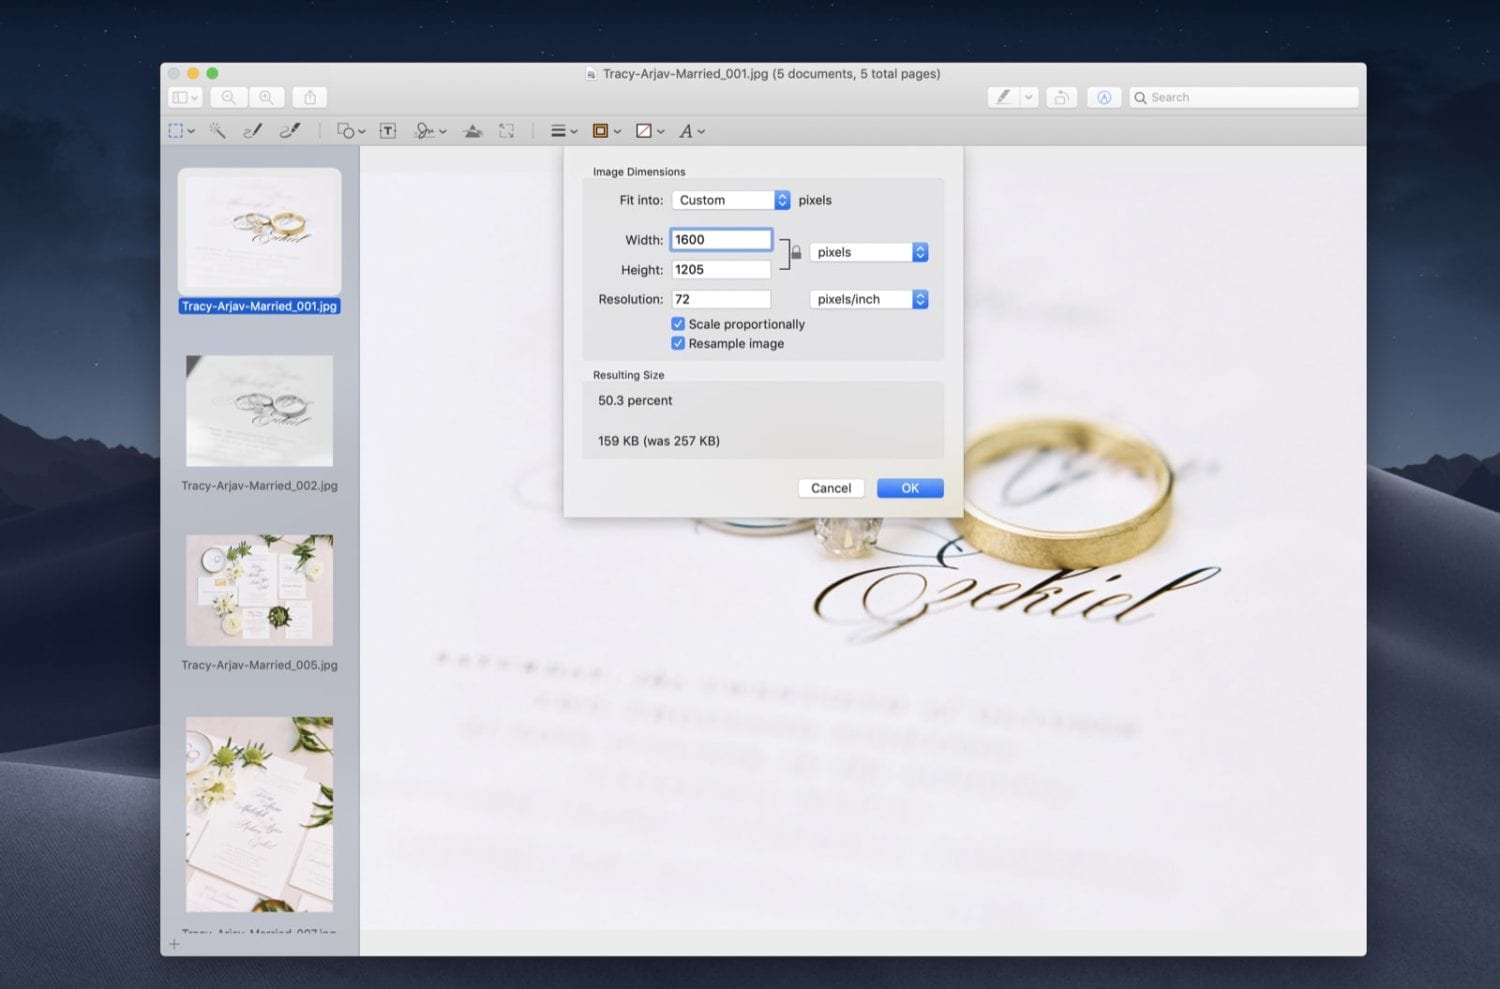
We can resize pretty easily using Preview (mac) which I will explain in the steps below.
- Create a new folder containing a copy of all the high-resolution images that you want to optimize. (Never optimize the originals!)
- Figure out how wide your images need to be
- Select all of your images (if they are all to be the same width)
- Right-click and select Open With > Preview
- All of the images should open up in one Preview window with each thumbnail in a column on the left
- Press cmd-A to select all of the image thumbnails
- Select Tools > Adjust Size
- Update the pixel width needed and set the resolution to 72
- Close preview (your images will automatically save)
Now it’s time to optimize your images with ImageOptim.
How I optimize my images using ImageOptim
Before we start, I suggest duplicating the folder that contains the images you want resized. ImageOptim has a lot of optimization power which means it’s possible to over optimize your images. Because ImageOptim can not save optimized images to a new folder destination like JPEGmini, there is no way to revert back to the high-resolution images if something goes wrong.
By duplicating the folder with all of the high resolution images, you can go back to the original folder if you optimize them too much and create a new copy and try again with less optimization power.
- Open ImageOptim and click on the gear icon to adjust the settings
- Select the “Quality” tab if not already chosen
- Enable “lossy minification” – This is where you can do a lot of damage so it’s best to have a backup of your images!
- Set the JPEG quality to 80% – I find that 80%-85% usually does a great job at reducing the file size without affecting color and quality
- Click the “Optimization Speed” tab and slide the optimization level toggle over to “Insane”
- Close out of the settings
- Now select all of the high-resolution images in your folder
- Drag them into the ImageOptim window
- ImageOptim will optimize the images and automatically replace the images in the folder
- Check the image quality and fine tune the JPEG quality percentage if needed. (just remember to use a fresh set of high-quality images and not optimize your already optimized images!)
Once you find the sweet spot for your ‘JPEG quality’, you can then keep those settings for future optimizations. Just be sure to always have a backup and never optimize your original images!
Before I end this section, I do want to mention that Showit automatically optimizes any image uploaded to your media library within the Showit app.
BUT
There is a reason why I wrote this post…
Showit automatically optimizes images
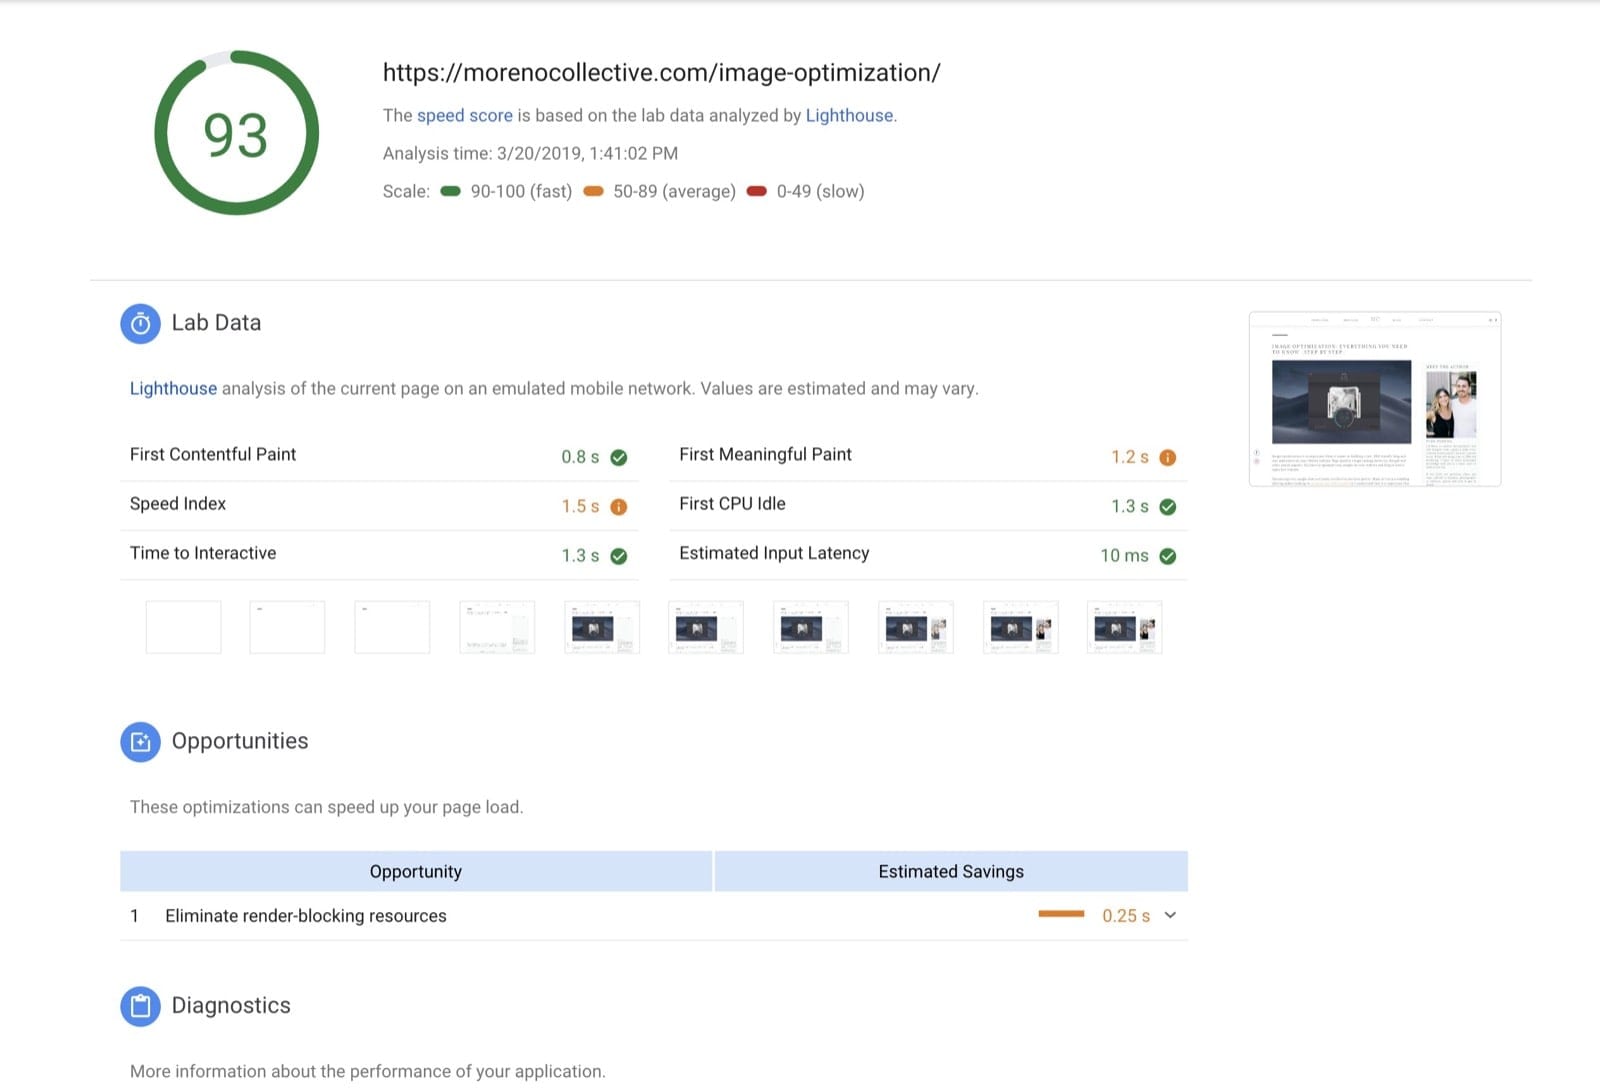
Showit automatically optimizes your images when you upload them to your website. But, I have found that popular website graders like GTMetrix and Google’s PageSpeed Insights are still giving a low rating to images that have been optimized by Showit.
I highly recommend optimizing your images before uploading them to your Showit website. However, it is really nice to know that if you forget to optimize an image or two, they will not negatively affect your site like a full resolution image would!
How to optimize images for your WordPress blog
As I mentioned above, I personally recommended optimizing your images before you upload them to your blog using the steps above. This saves server space and reduces the time it takes to upload your images.
With that said, If you prefer to have a plugin do the work for you, there are a few WordPress plugins that work really great with your Showit blog.
If you have a tier 2 Showit subscription, your blog comes pre-installed with an image optimization plugin called “Smush Pro”. This plugin (pro version only) does a great job at optimizing your blog images even if they are already optimized. It also has a CDN option that I recommend using.
If you have a Tier 3 Showit account, you can use a free plugin called “reSmush.it” or you can look into our monthly SEO services, which includes these plugins on your website (plus a whole lot of other benefits!)
Using the Smush Pro plugin on your Showit Blog
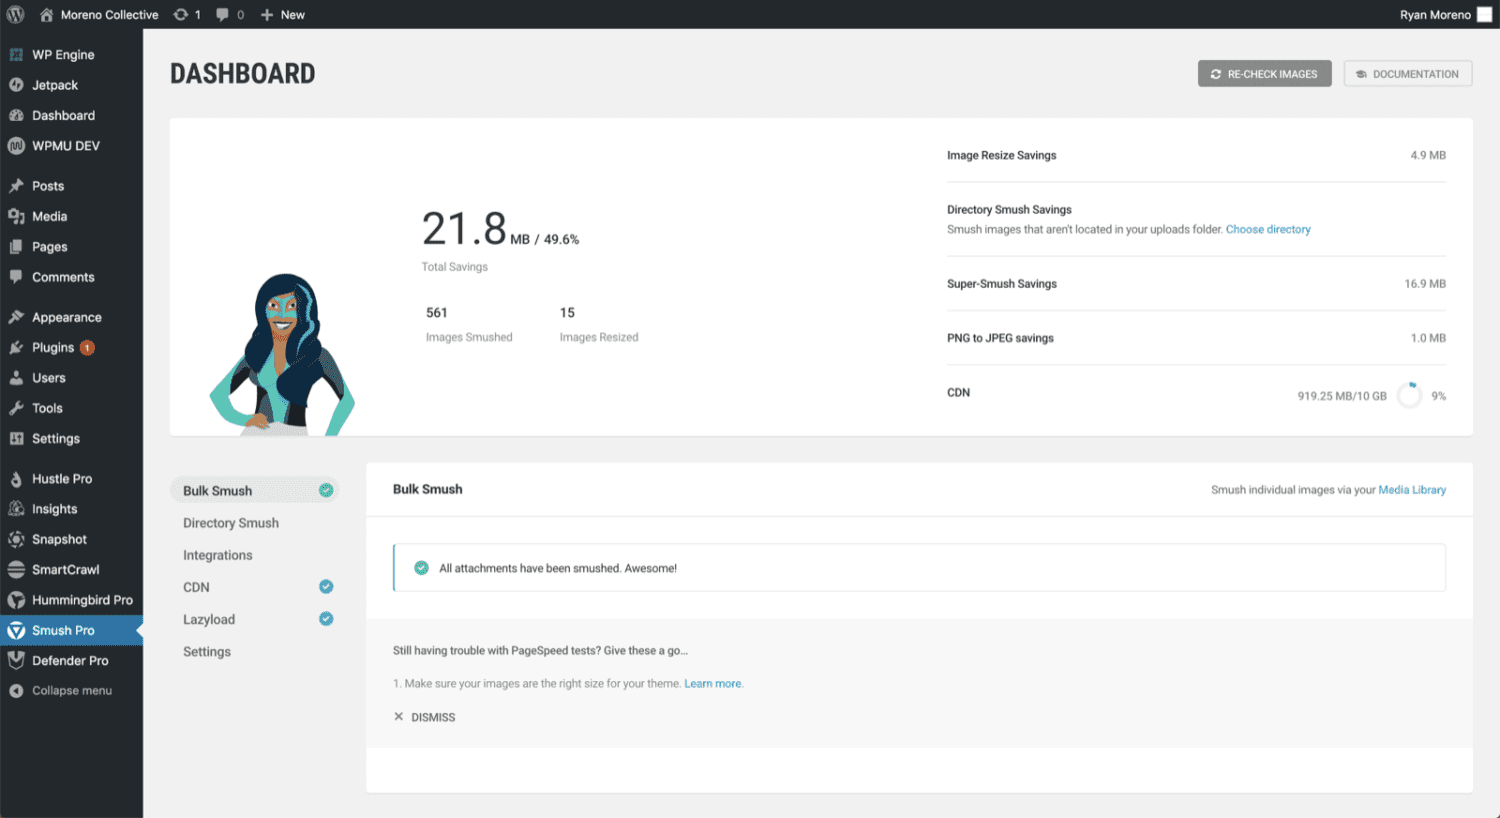
Smush Pro is the best image optimization plugin out there, and with your tier 2 Showit account you get this plugin for free!
It not only has image optimization features but also images resizing, image CDN, lazy loading, and image recovery options.
Here’s how to set up Smush Pro on your Showit blog
- In the Smush Pro “Bulk Smush” settings toggle the following
- Automatically smush my images on upload (with all image sizes checked)
- Super-smush my images
- Strip my image metadata
- Resize my full-size images (make sure the width is 2x times your blog content width)
- Smush my original full-size images
- Store a copy of my full-size images
- Auto-convert PNGs to JPEGs (lossy)
- Click the “CDN” tab, click activate, and toggle the following
- Enable automatic resizing of my images
- Enable WebP conversion
- Click the “Lazyload” tab and activate. Toggle the following
- Media Types (all)
- Output Locations (all)
- Animation (none)
- Include / Exclude (toggle all on)
- Lastly, click the settings tab. Make sure “Enable high contrast mode” is toggled off.
If you do not have a tier 2 Showit account with Smush Pro installed already, I would recommend using a free plugin called reSmush.it
Using the reSmush.it plugin on your Showit Blog

If you have a tier 3 Showit subscription “advance blog” you will need to install your own plugins. If you don’t have Smush Pro, then installing a free image optimization plugin called reSmush.it is a great alternative.
Here’s how to set up reSmush.it on your Showit blog
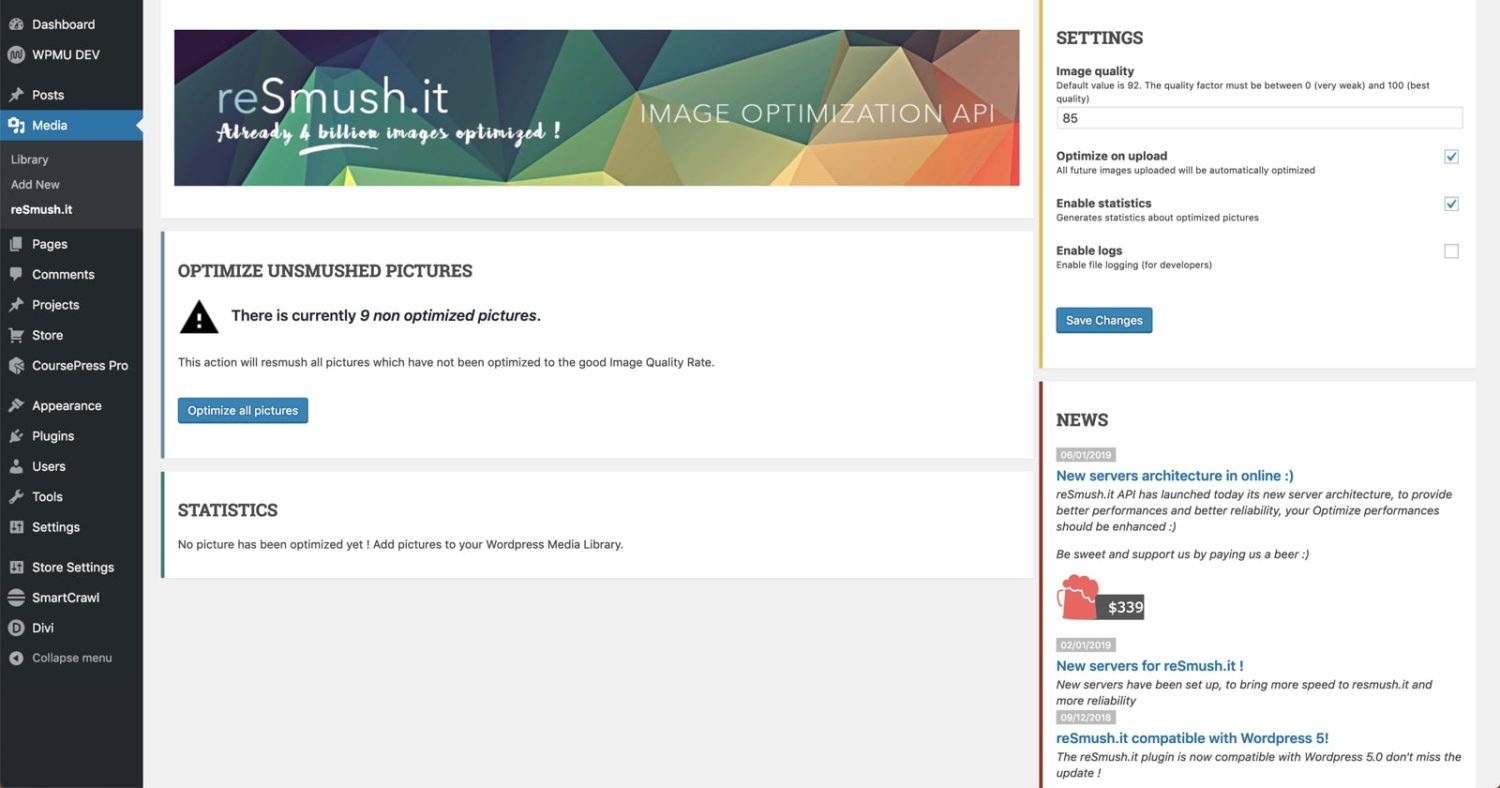
- Install and activate the reSmush.it Image Optimizer plugin
- In your WordPress dashboard, hover over “Media” on the left side navigation and then select “reSmush.it”
- Under settings, set the image quality to 80% – 85%
- Check “optimize on image” and “Enable statistics”
- Click “Optimize all pictures”
Conclusion
Optimizing your images is vital for page speed, which is a major ranking factor in your SEO. It increases the user experience on your website which in turn makes Google happy.
I recommend everyone to take control of your website and use these tools I’ve share with you to optimize your images, speed up your website, increase its user experience, and boost your SEO.
If you have any questions at all or are in need of SEO help, please feel free to reach out to us. I offer on-page SEO that covers image optimization on your Showit website and WordPress blog.
Mar 18, 2019

Ryan Moreno
Post by:
//
First of all, thanks for the nice tips. I too believe, Alt Tag plays a most important role in SEO things because the search engine cannot read the image but it can read the text which is nothing but Alt Tag.…
Also, everyone should make sure to insert the title into the images by using HTML code for SEO purposes. The images can help site owners to increase traffic and also sales. I have used Picasa for image re-sizing and it has worked out great so far. After image compression, it creates an ability to reduce blog loading speed and I think it’s better for SEO as well.
I have to admit that I do concern myself with the keyword in the image, the image file size, and open graph. These Image SEO tips help me a lot to find images in a better way. I hope this might be useful for my blog.
Great article! you have covered everything about image SEO. Keep up the good work..!!